

How To Add Summary Block To Main Blog Page
How To Start a Blog on Squarespace (And Why You Need To Right Now!)
Here's a step-by-step guide for starting your first blog, as well the reasons why you should start one right now.

There are so many benefits to starting a blog.
The first is that blogging helps your SEO. When trying to rank higher in search results, you're competing based on keywords. By frequently creating new pages on your site (in the form of blog posts) you keep giving your site more and more opportunities to rank. This means you now have the opportunity to get in front of different types of people depending on what they're searching.
In addition to helping your SEO, blogs help you provide valuable information to potential clients and help you become recognized as a subject matter expert.
Another benefit of blogging is that each post you create can be turned into a lot of content for different platforms – one blog post can give you content for a YouTube video, Pinterest pins, and social media posts. It's also content you can send to your email list!
Not only does this give you a presence on different platforms and opportunities to reach more people, it's also driving traffic back to your site in the process.
With that, let's look at how to actually start a blog on Squarespace.
1. Choose the main topic that you're going to blog about.
Based on your current website and business, choose a topic that makes sense for you to blog about. Think about what you're knowledgeable about, what you like learning about and researching, and/or what your ideal customers might want to read about.
When you choose your main topic, keep it broad to give yourself plenty of content to blog about.
2. Brainstorm different categories within this topic that you could write about.
After you've chosen then main topic that you're going to write about, come up with a list of categories within that topic you could potentially write about. See how many different ideas you can come up with.
For example, our main blog topic is web design, but within that topic we discuss custom code, brand development, Squarespace specific topics, marketing, etc.
By creating these sub-categories, you'll help yourself come up with a variety of different things to blog about. Whenever you're stuck on what to write about, look back at these categories to jog some new ideas.
Hint: if you come up with actual blog post ideas during this stage, write those down too on a separate list. Keeping a running list of blog post ideas as you come up with them is a great way to make sure you never run out of ideas for things to write about!
3. Choose how frequently you're going to post and then create a content calendar.
When it comes to blogging, consistency is key. Regardless of whether you post once a week or once a month, it's important to post consistently.
The best way to do this is to make a content calendar so you can hold yourself accountable to posting. Once you choose how frequently you're going to post, mark a calendar with the dates you're going to post. Then, decide what you're going to write about for each of those posts using the categories you brainstormed above.
Here's an example of what our content calendar looks like (we've also added when the pins, emails, and social media posts will go out for each post as well to help keep it all organized):

4. Create a blog template in Squarespace
Creating a blog template on your Squarespace site allows you to make sure you're including everything you want to in each post without having to remember and recreate it each time.
Start designing your base template by creating a new blank blog post. In this template, add things that you want to include in each post like a heading, header image, a place for the text you write, a related post reel, a place for an image for visitors to pin to Pinterest, and/or an email opt in box or freebie.
Each time you write a new post, duplicate this template then fill in the text and images as needed. Not only will this save you time but it'll also make sure your blog posts look consistent.
5. Start writing your blog posts.
Start by creating a skeleton of what you're going to write about. List out the headings or questions you want to answer. It may be helpful to do some keyword research at this point too to make sure you're including a specific keyword that you'd like to rank for with this blog post.
Then write out your post. Aim to write at least 500 words for each post, but ideally over 1,000. (This will help your SEO, too).
As you write, make sure to break up the text into smaller paragraphs to make the post easily skimmable.
To make sure you're able to keep with the posting schedule you created, we recommend writing your posts in batches and then scheduling them to post at your desired frequency. Not only does this help you keep with your schedule but it also makes the writing process easier – if you're in the flow of writing, why not keep writing?
Write a few blog posts at once, or a few over the course of a week and then set them to auto publish in Squarespace.
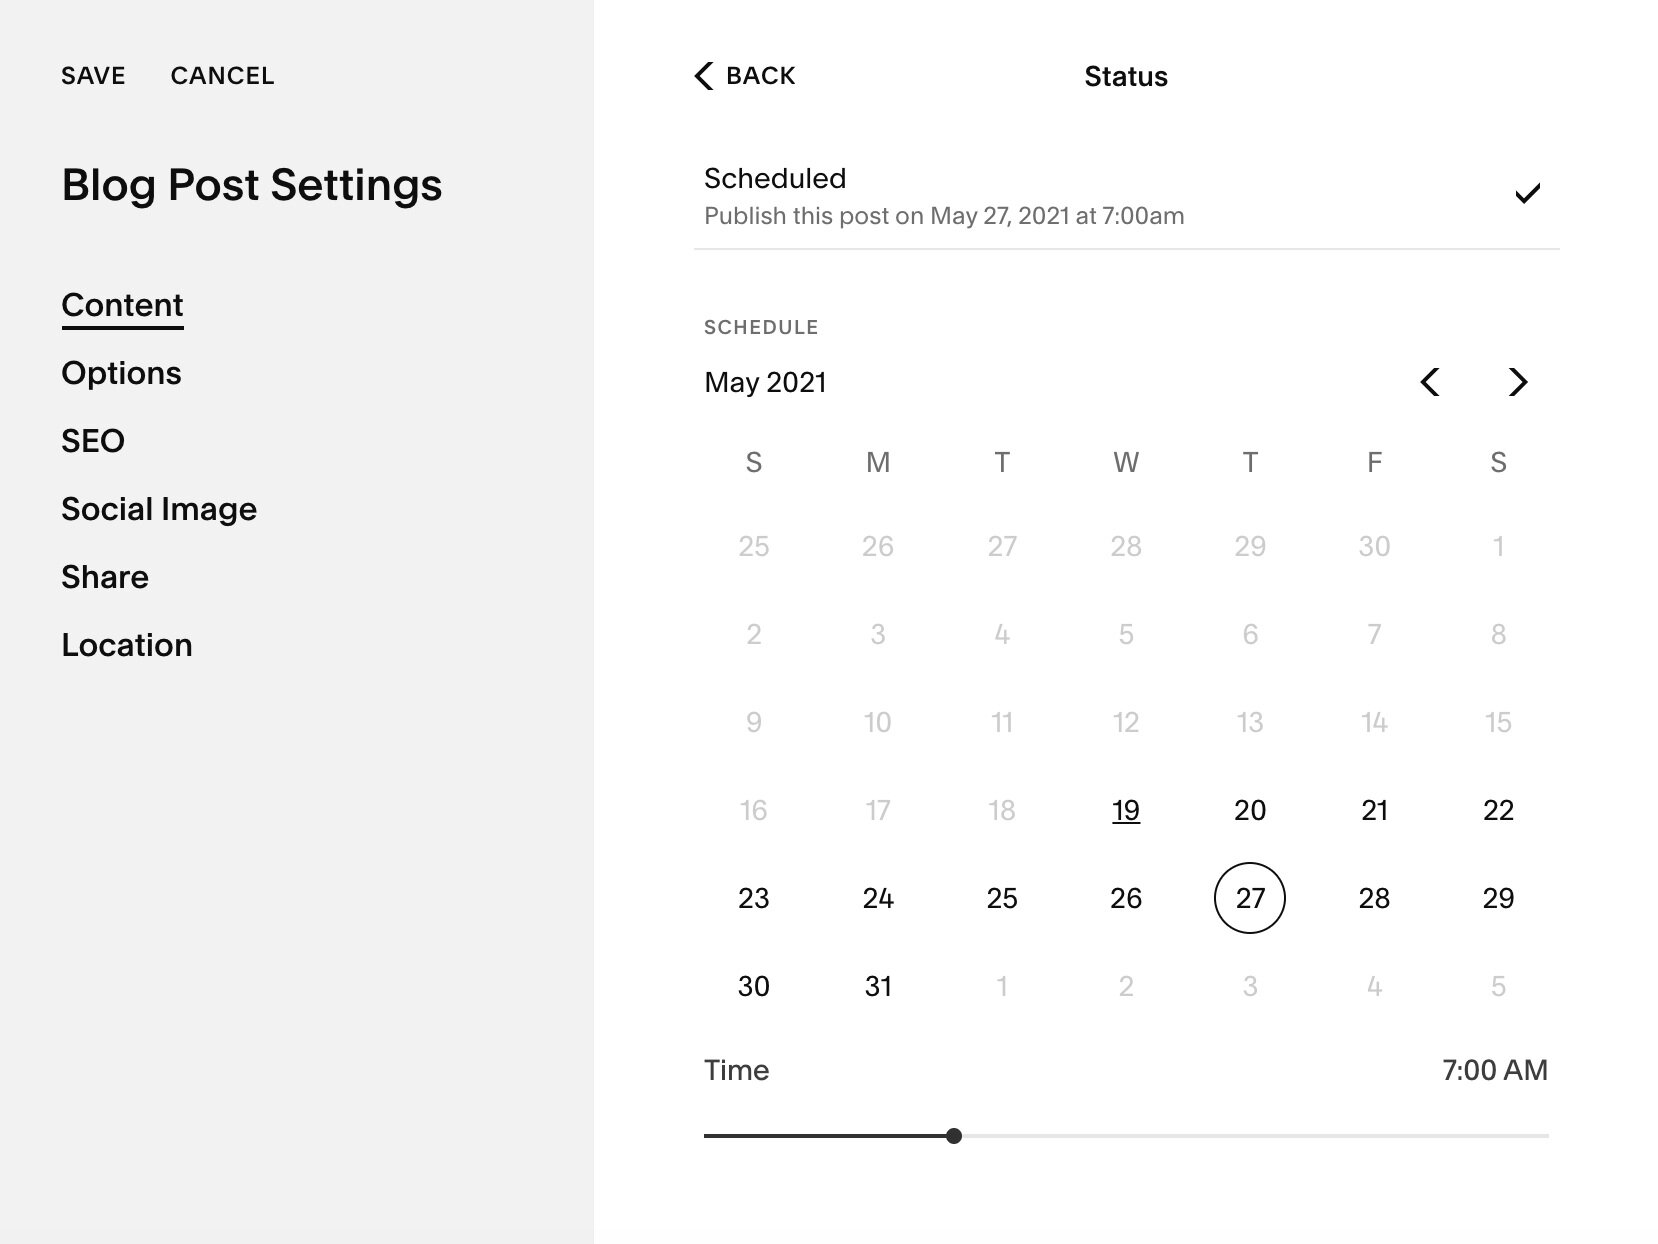
To schedule a post to publish automatically, click the 3 dots next to the post then click "Settings". Click "Status", then click "Scheduled" and select the date and time for when you'd like your post to be published:
6. Add tags and categories to organize your posts.
For each post, it's helpful to add tags or categories to keep your posts organized. You may consider adding categories based on the different categories of things you write about within your main topic or add tags to further sort your posts.
When your posts are organized like this, you can choose to display different categories or tags in summary blocks in different places on your site.
You can also use tags to make sure you're not displaying your current blog post in your related post reel.
To add tags and categories to your Squarespace blog post, click the three dots next to your blog post and you'll see the menu options for "Tags" and "Categories":

7. Add a thumbnail image for your post.
For each blog post you create, you may want to add a thumbnail image to be displayed with your post, either on your blog home page or on a summary block.
To add an image, click the three dots next to your blog post and then click "Options". Click "Add Image" and upload the image you want to display for the post.

8. Update the URL and excerpt for your post.
Also under "Options" you can update your "Post URL" and "Excerpt".
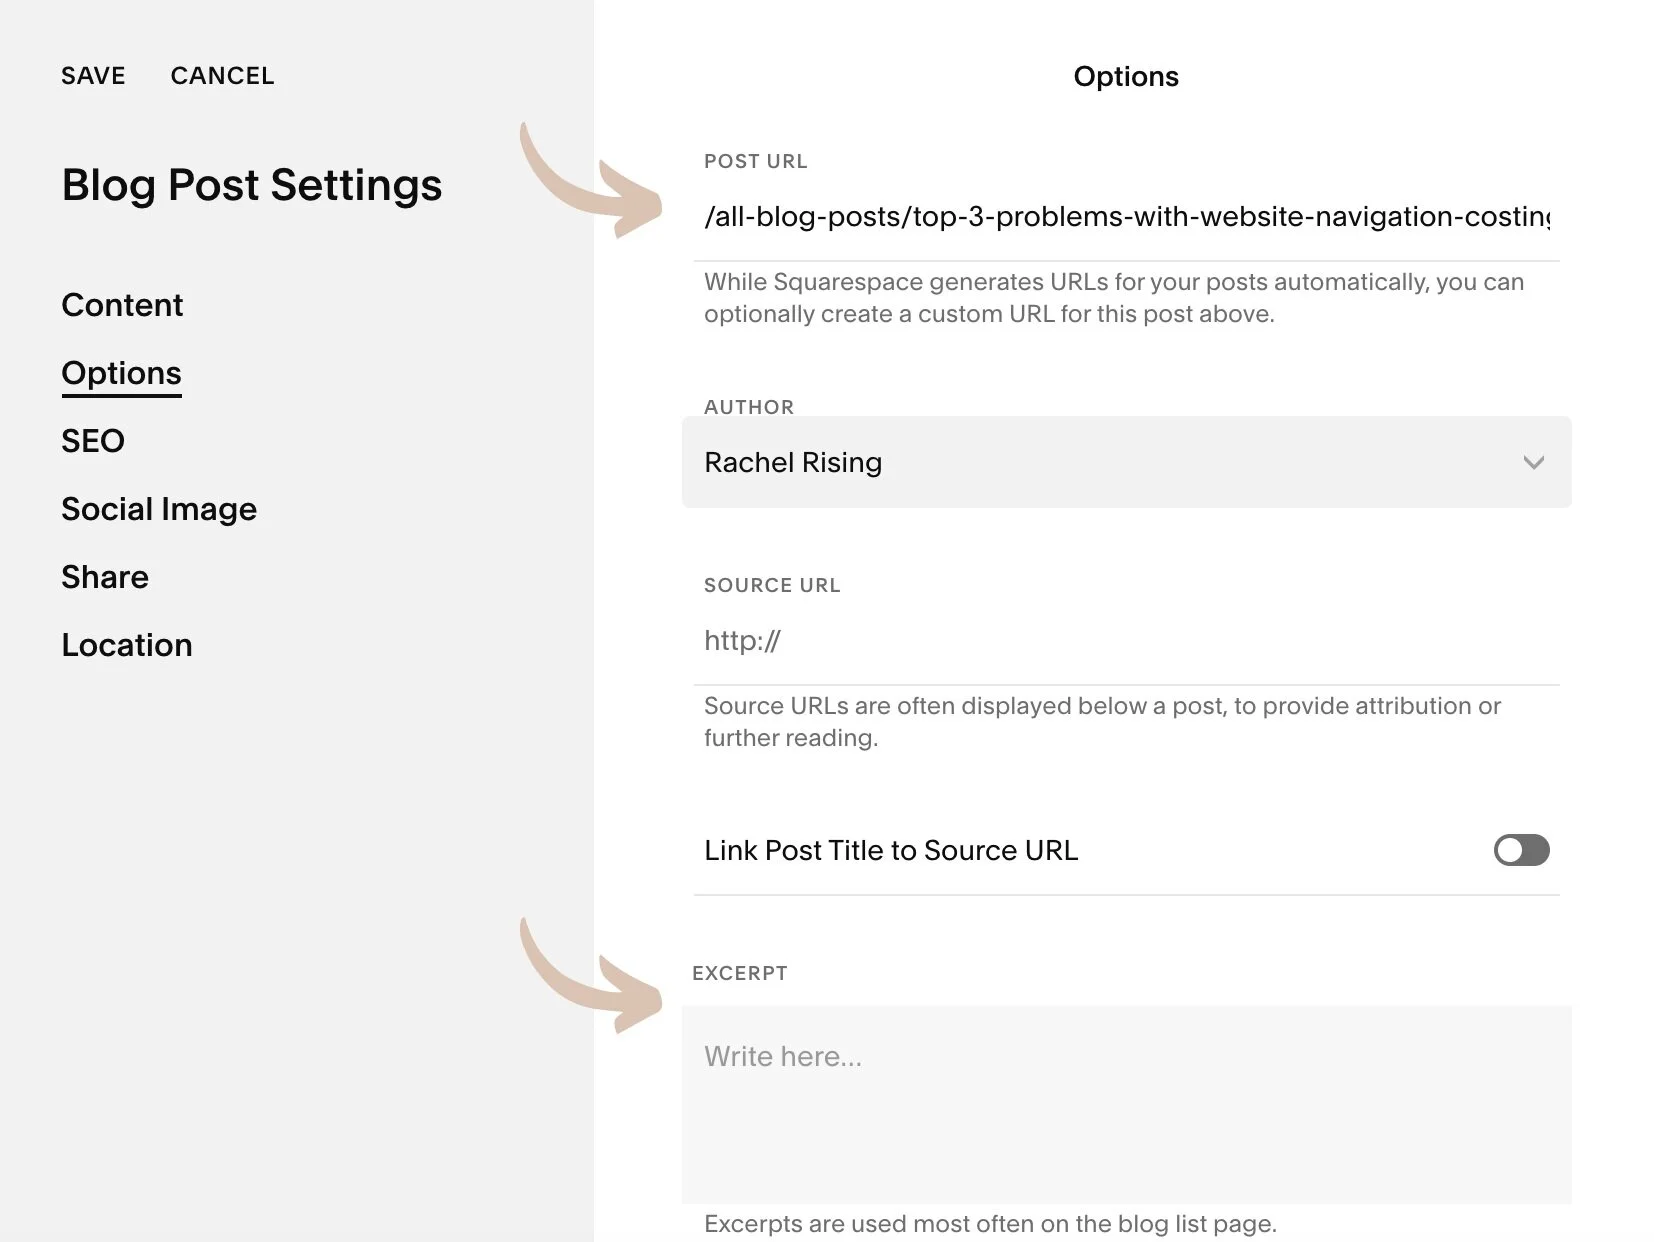
Update the URL from the one Squarespace automatically generates to make sure you the URL includes your keywords and accurately describe your post (you'll likely be able to copy and paste the title of your blog post here as long as it contains your keywords and accurately summarizes what your post is about!).
You also have the option to add an excerpt here (basically a few sentences to describe your blog post). You can choose whether you want to display this excerpt on your blog home page or in any summary blocks you create.
9. Update the SEO description for your post.
The SEO description is the description of your blog post that appears in search engine results. To update this description, click the three dots next to your blog post and then click "SEO" and scroll down to "SEO Description".

This is another great opportunity to write a summary of your blog post using your keywords for your post to help improve your SEO.
You can also choose to enter a new SEO title for your post or leave that field blank. If you it blank, the title of your blog post will automatically be displayed when your post appears in search results.
10. Customize your blog post home page.
As you publish each blog post, they will be added to your blog post home page.
On this page, you can choose the layout for how your blog posts display. To change the layout, click the pencil icon next to your blog posts once you're on your blog home page. Choose the layout you'd like from the layout dropdown menu.

You also have the option to choose what you want to display for each post: the title, excerpt, image, and meta data (date the post was published, who wrote the post, etc.).
If you'd like to further customize the look of your blog home page or want to display more than 20 posts before a visitor has to click to see more, you can also create a new blog home page using summary blocks.
To do this, create a new blank page and add a summary block that displays posts from your blog. In a summary block, you can display up to 30 posts. To display more than that, simply add another summary block above or below your current one, then use tags on your blog posts to break them into groups of 30 to display on each summary block.
Once your new blog home page is set up, make sure you link that page in your navigation and move your blog post database to the "Not Linked" section of your site.
pin it for later!

How To Add Summary Block To Main Blog Page
Source: https://tendaydesigns.com/all-blog-posts/how-to-start-a-blog-on-squarespace-and-why-you-need-to-right-now
Posted by: larsonourst1973.blogspot.com
0 Response to "How To Add Summary Block To Main Blog Page"
Post a Comment